
Tutorial - Art Gallery
Go back to Card Tutorials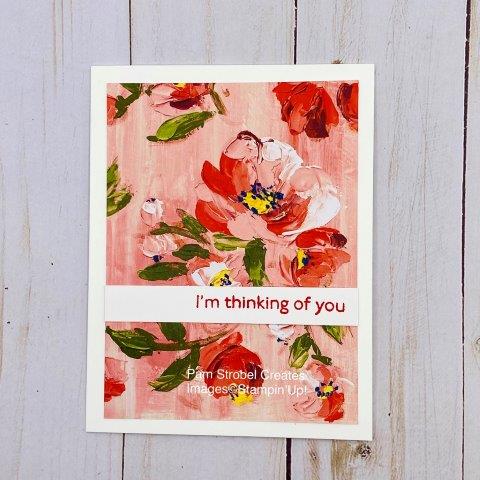

Click Simple, Step Up, or Avid buttons to change the card tutorial.
What Pam Says
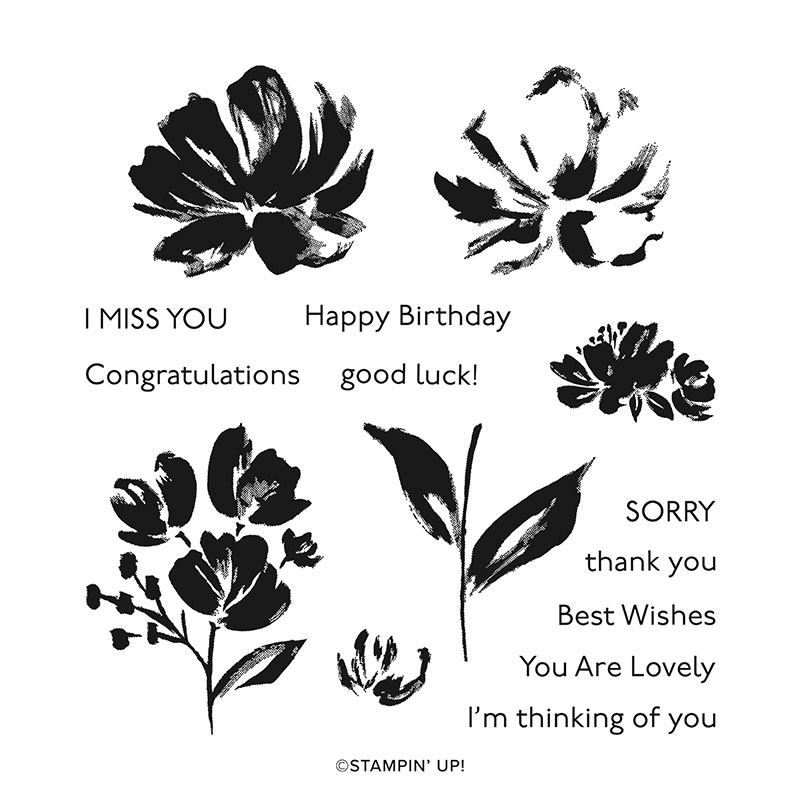
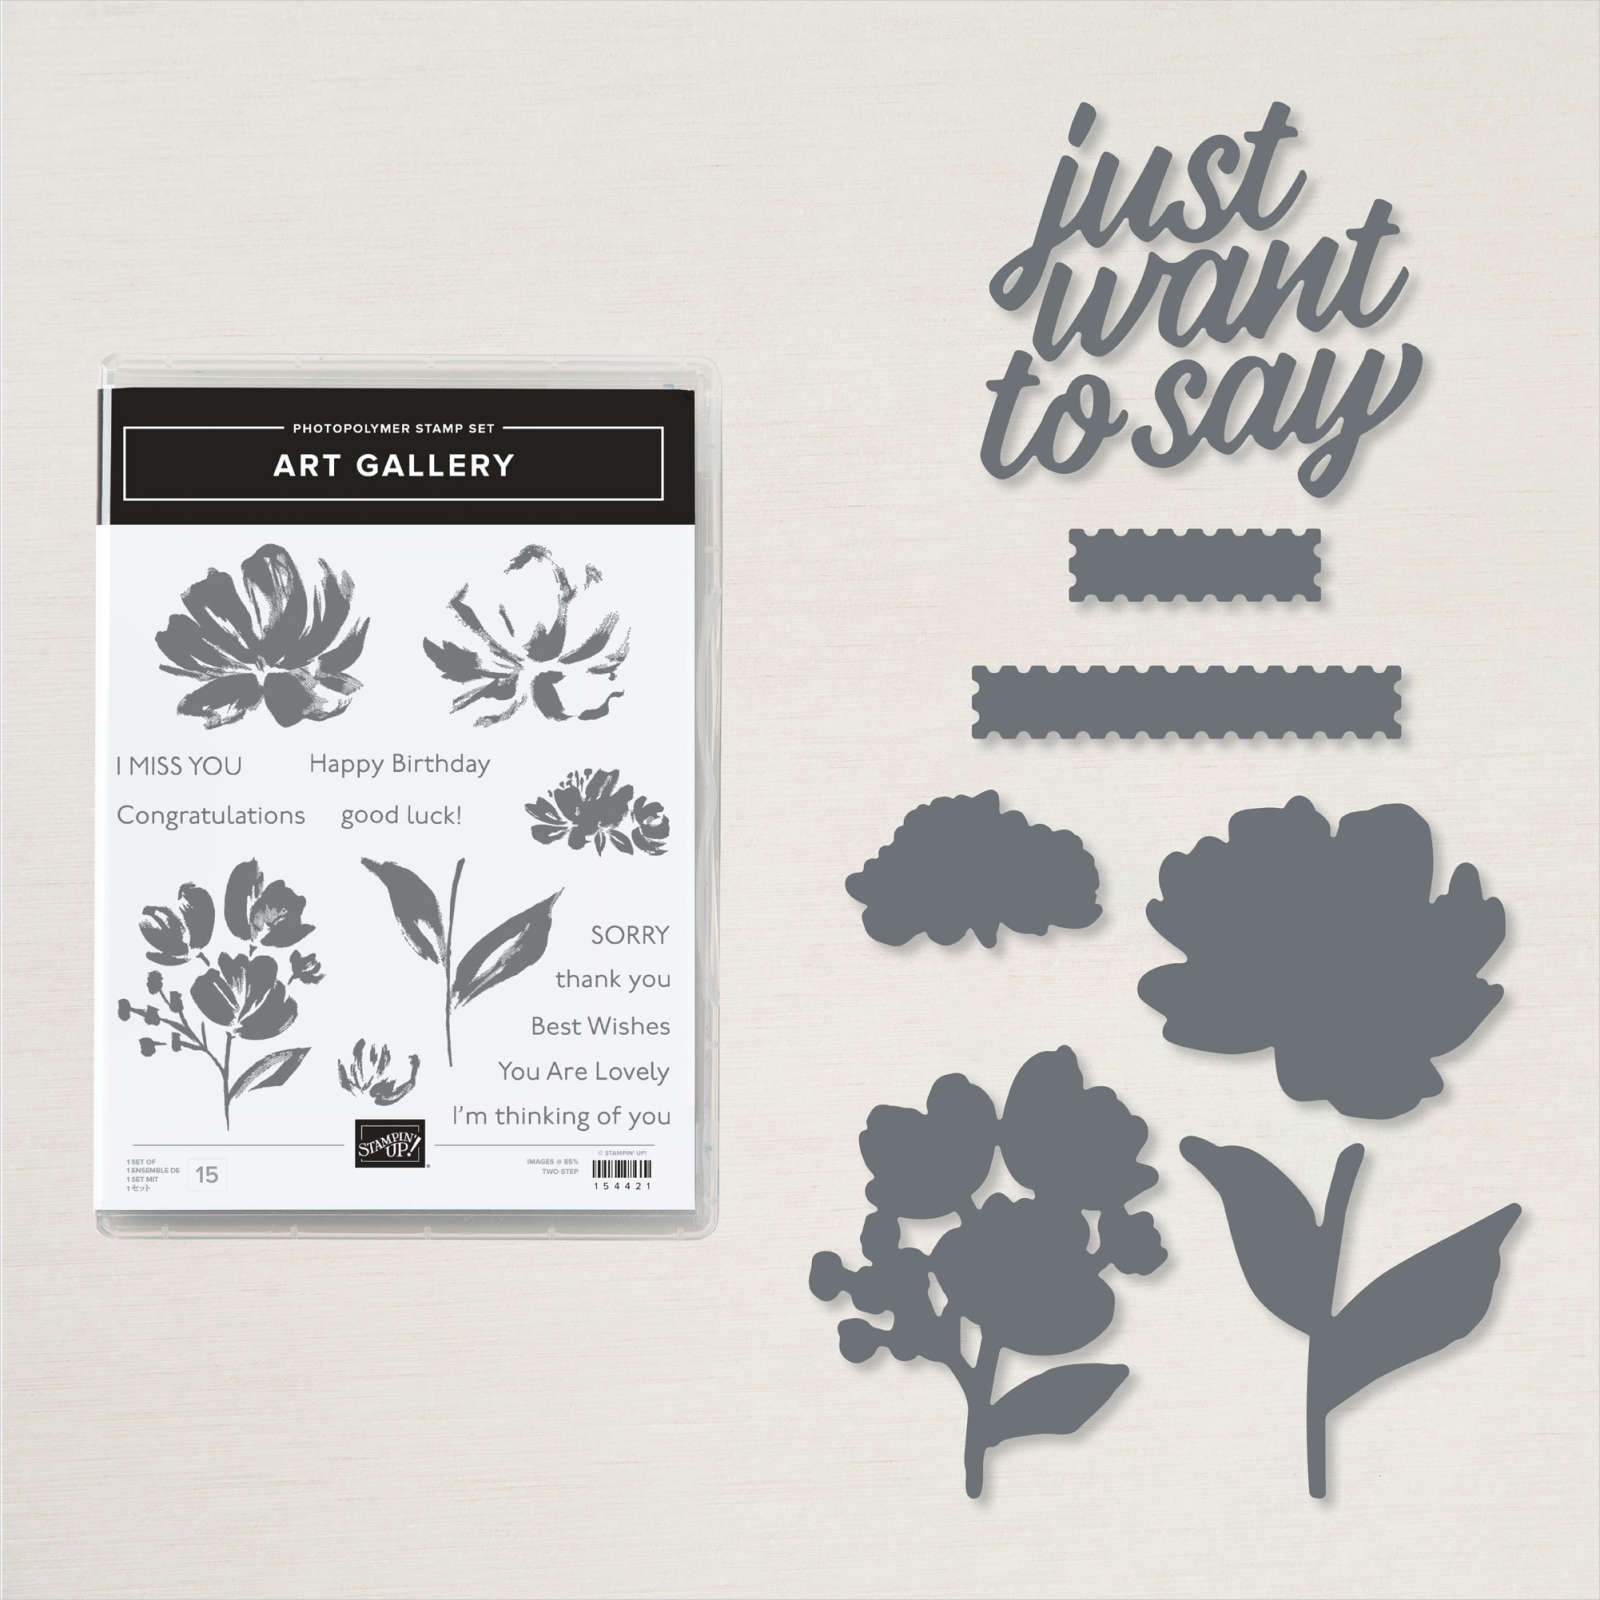
With the Art Gallery stamp set you can easily layer brush strokes of color each time you make your flowers. Another big plus is that it comes with 9 everyday sentiments, and I love the convenience of having all of them at my fingertips.
Instructions - Simple
You can find the full Simple tutorial below but if you prefer to download and print a FREE PDF version you can click HERE.
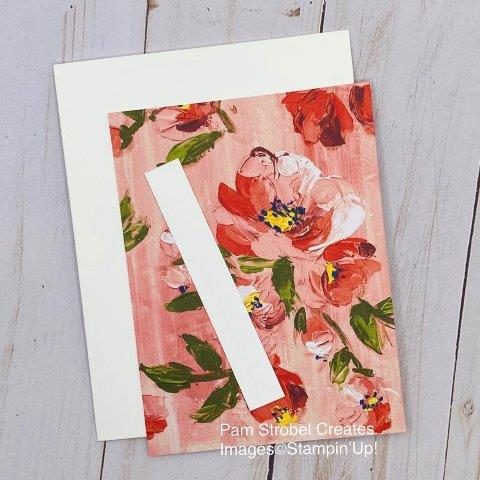
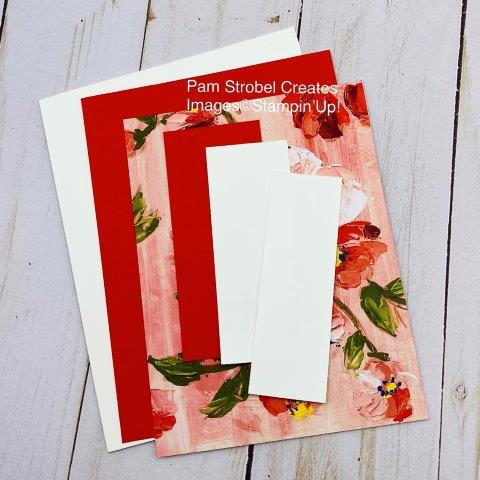
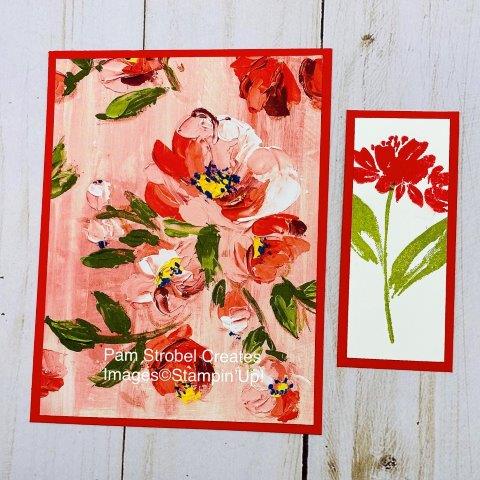
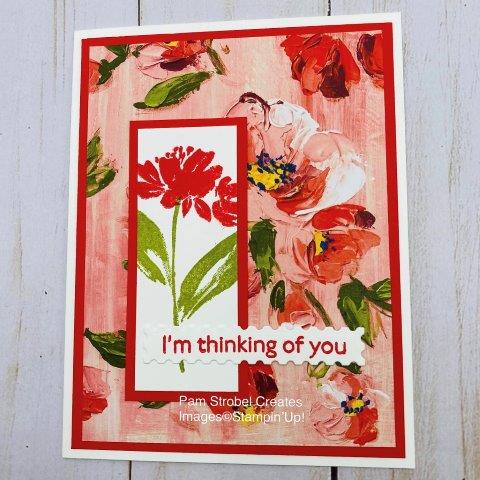
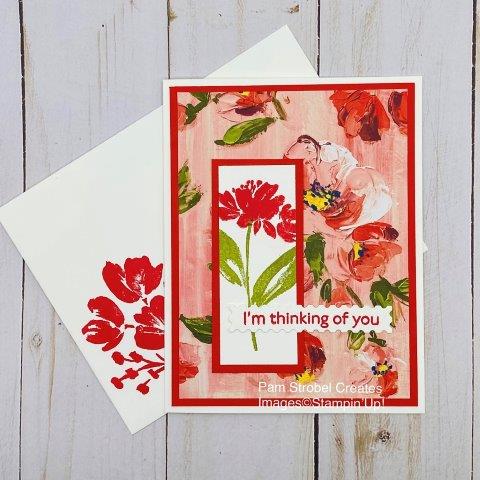
1) Cut a Thick White card base measuring 8 ½” x 5 ½” , score and fold at 4 ¼” on the 8 ½” side
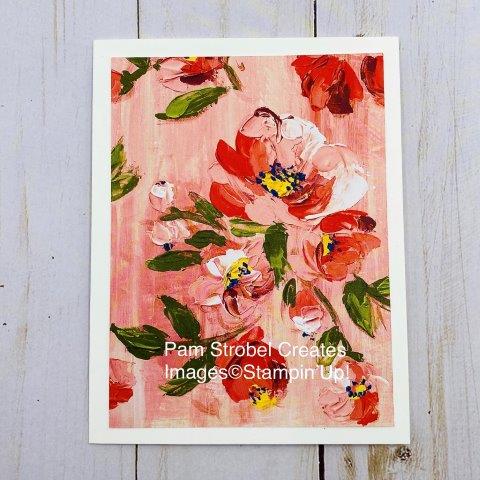
2) Cut a 5” x 3 ¾” floral panel from the Fine Art Floral Designer paper
3) Cut a white sentiment strip 3 ¾” x ⅝” .
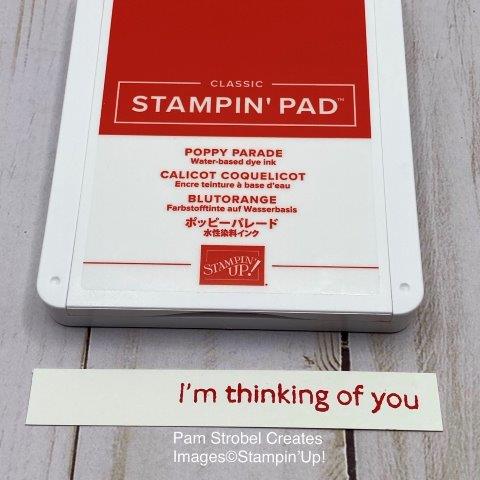
4) Using Poppy Parade ink , stamp the I’m thinking of you in the right corner of the white sentiment strip.
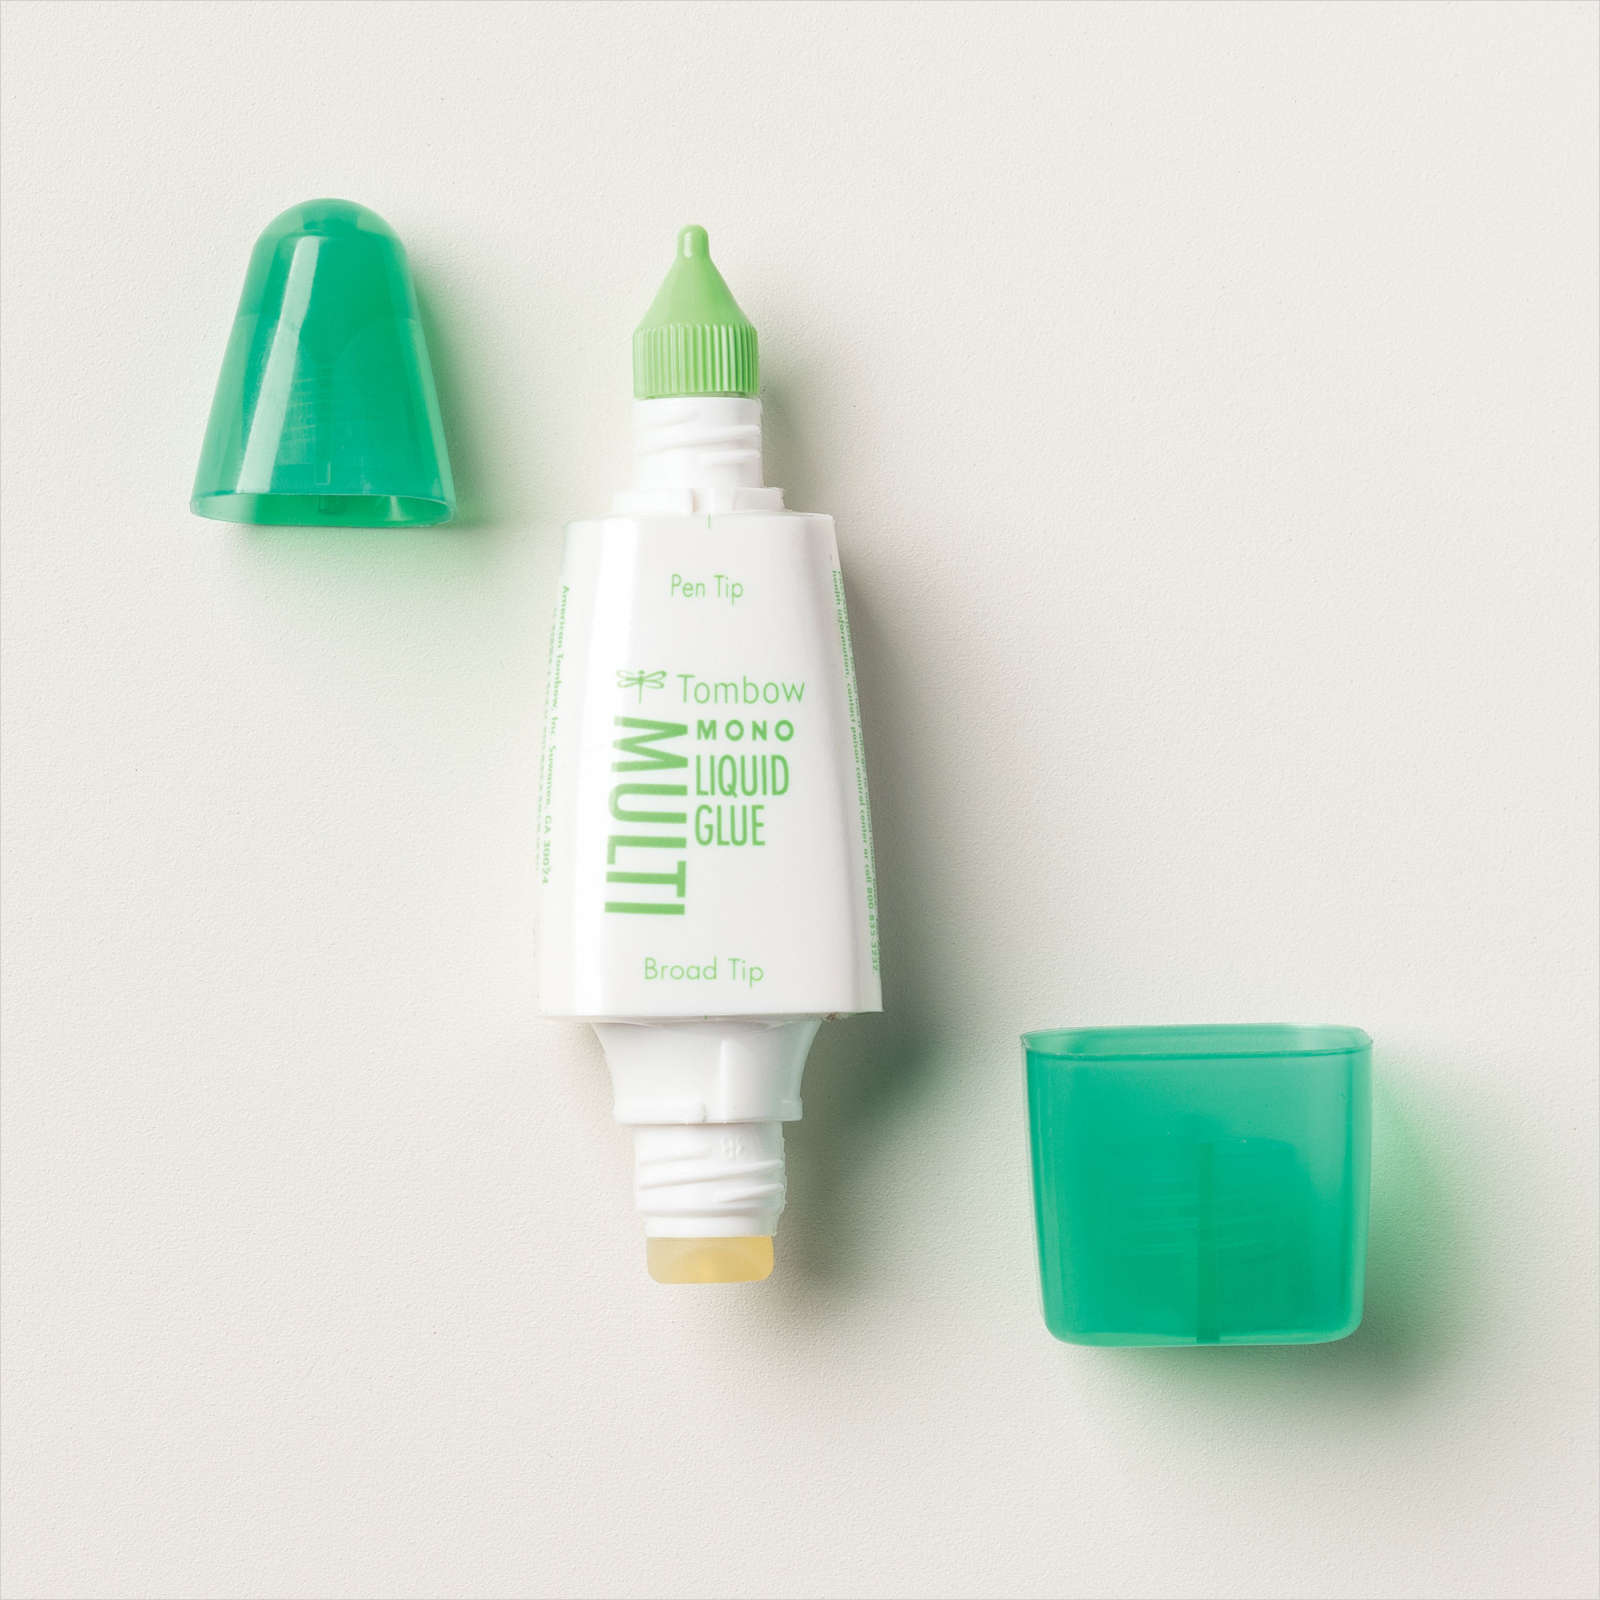
5) Apply a thin line of Multi purpose adhesive on the back of the floral paper and adhere to the folded card base maintaining an equal border of white showing.

6) Apply a thin line of Multi purpose adhesive on the back of the sentiment strip and apply over the floral panel. Using the Multi purpose glue allows you to lift up and reposition the sentiment if necessary.
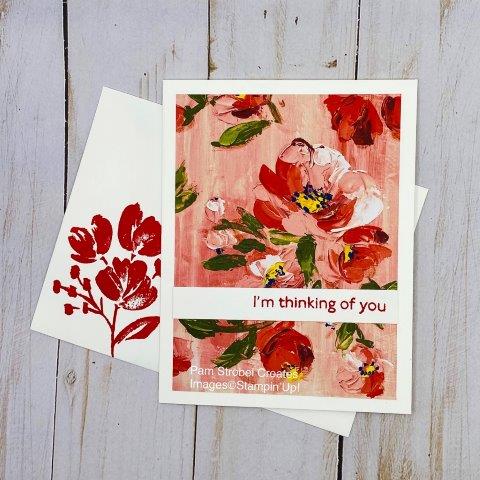
7) Customize your Simple card by making a pretty matching envelope with the Poppy Parade ink and the flower image from the Art Gallery stamp set . Your stamped envelope will stand out amongst the other plain mail often seen in our mailboxes.
Product Used - Simple


Instructions - Step Up
You can find the full Step Up tutorial below but if you prefer to download and print a FREE PDF version you can click HERE.
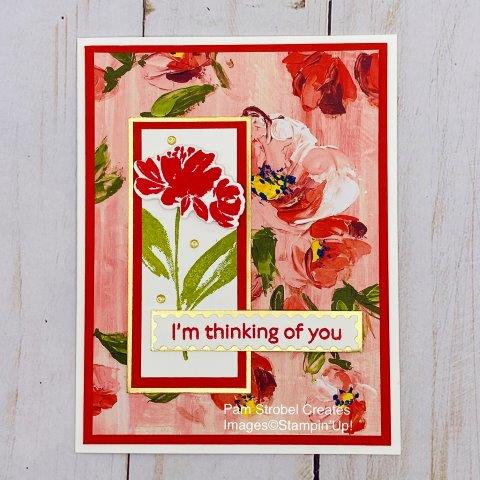
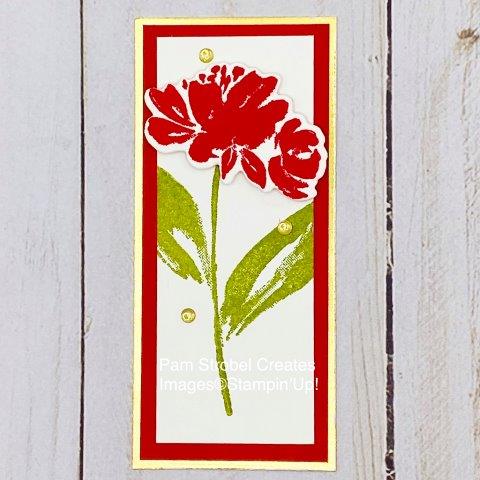
1) Cut a Thick White card base measuring 8 ½” x 5 ½” , score and fold at 4 ¼” on the 8 ½” side
2) Cut a Poppy Parade layer 5 ¼” x 4” and 3 ½” x 1 ½”
3) Cut a 5” x 3 ¾” floral panel from the Fine Art Floral Designer paper
4) Cut 2 white pieces 3 1/4” x 1 1/4”.

5) Using Poppy Parade ink , stamp the “I’m thinking of you” in the middle of 1 of the white pieces. Die cut the sentiment with the Floral Gallery Dies.

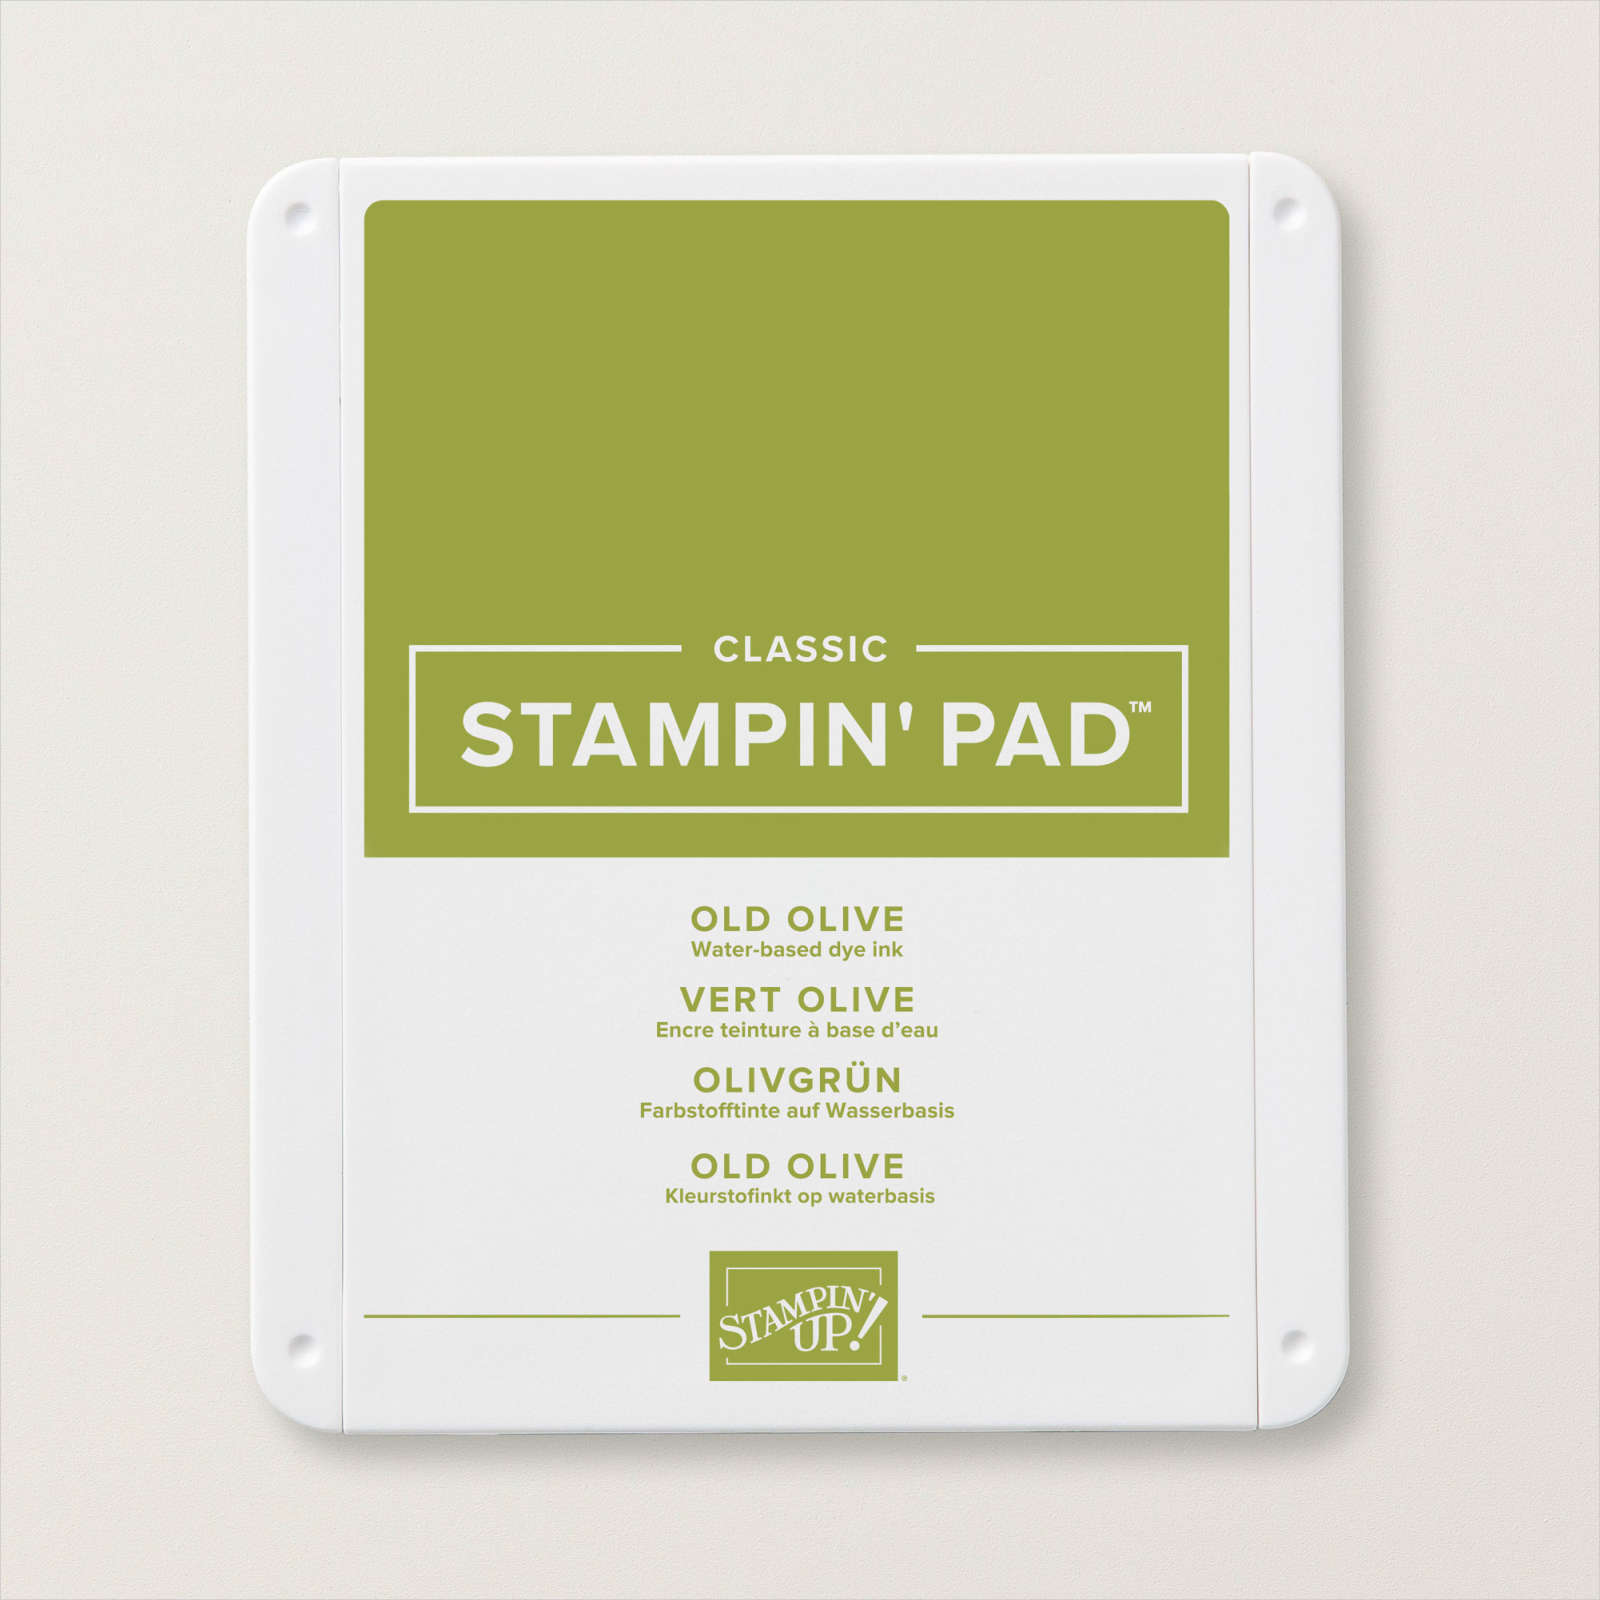
6) Using Old Olive ink, stamp the leaves and then the blossom in Poppy Parade ink. Both of the stamp images will be cut off the edges when finished.
7) Apply a thin line of Multi purpose adhesive on the back of the floral paper and the stamp white piece and adhere to the Poppy Parade pieces.Maintain an equal border showing on the edge. Using the Multi purpose glue allows you to lift up and reposition the layer if necessary.
8) Apply adhesive to the back of the small floral panel and adhere to the large floral piece. Do the same with the sentiment piece applying over the top of the floral panel. Now adhere the whole piece to the thick white card base. (make sure your fold is on the left hand side).
9) Customize your gorgeous floral card by making a pretty matching envelope with the Poppy Parade ink and the flower image from the Art Gallery stamp set . Your stamped envelope will stand out amongst the other plain mail often seen in our mailboxes.
Product Used - Step Up

Instructions - Avid
You can find the full Avid tutorial below but if you prefer to download and print a FREE PDF version you can click HERE.
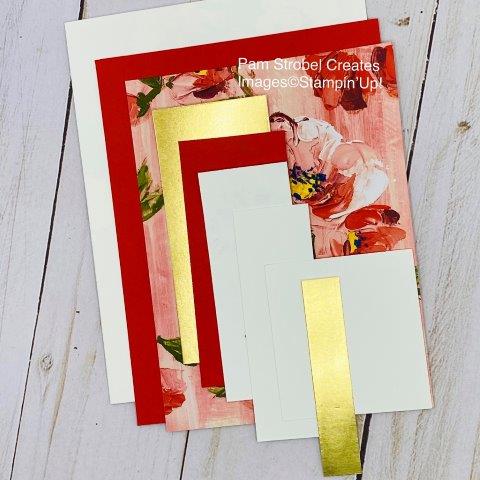
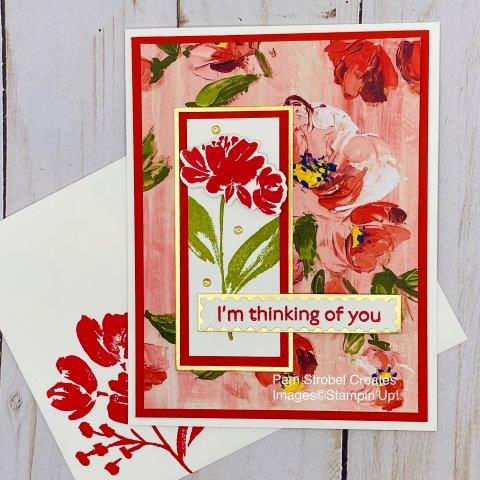
1) Cut a Thick White card base measuring 8 ½” x 5 ½” , score and fold at 4 ¼” on the 8 ½” side
2) Cut a Poppy Parade layer 5 ¼” x 4” and 3 ½” x 1 ½”
3) Cut a 5” x 3 ¾” floral panel from the Fine Art Floral Designer paper
4) Cut 2 white pieces 3 ¼” x 1 ¼” and 1 piece 2 ¼” x 2 ¼”
5) Cut 1 Gold Foil piece 3 ⅝” x 1 ⅝” and 1 piece 2 ¾” x ½”
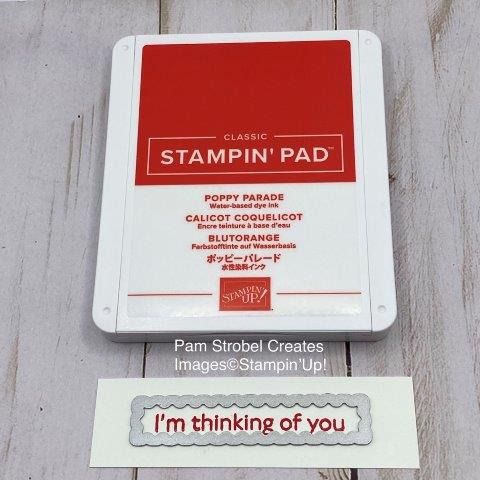
6) Using Poppy Parade ink , stamp the “I’m thinking of you” in the middle of 1 of the white pieces. Die cut the sentiment with the Floral Gallery Dies.

7) Using Old Olive ink, stamp the leaves and then the blossom in Poppy Parade ink. Both of the stamp images will be cut off the edges when finished.

8) Apply a thin line of Multi purpose adhesive on the back of the floral paper and the stamp white piece and adhere to the Poppy Parade pieces.Maintain an equal border showing on the edge. Using the Multi purpose glue allows you to lift up and reposition the layer if necessary.

9) Apply adhesive to the back of the floral panel and adhere to the larger gold foil piece. Do the same with the sentiment piece applying over the top of the small gold foil piece.
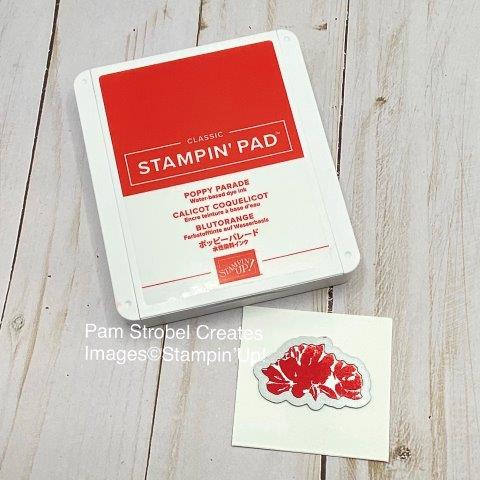
10) With Poppy Parade ink, stamp and die cut the floral image on the small square white piece.
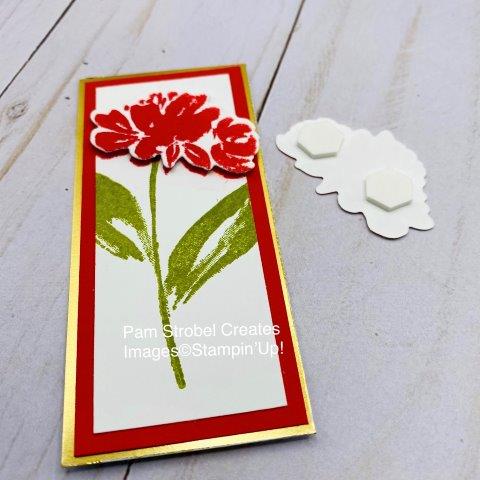
11) Apply Stampin’ Dimensionals to the back of the die cut floral piece. Adhere that piece over the top of the other stamped flower. You can also offset it a bit if you would like some of the under-flower showing.
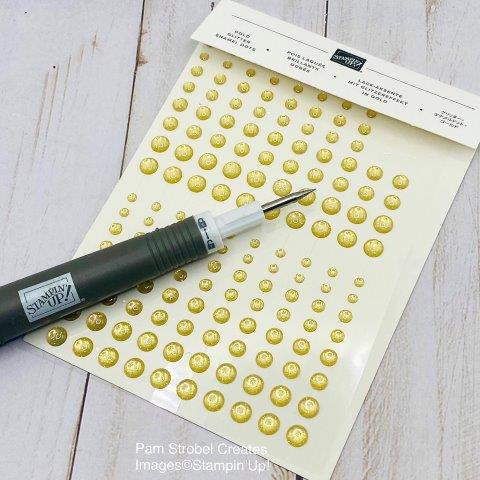
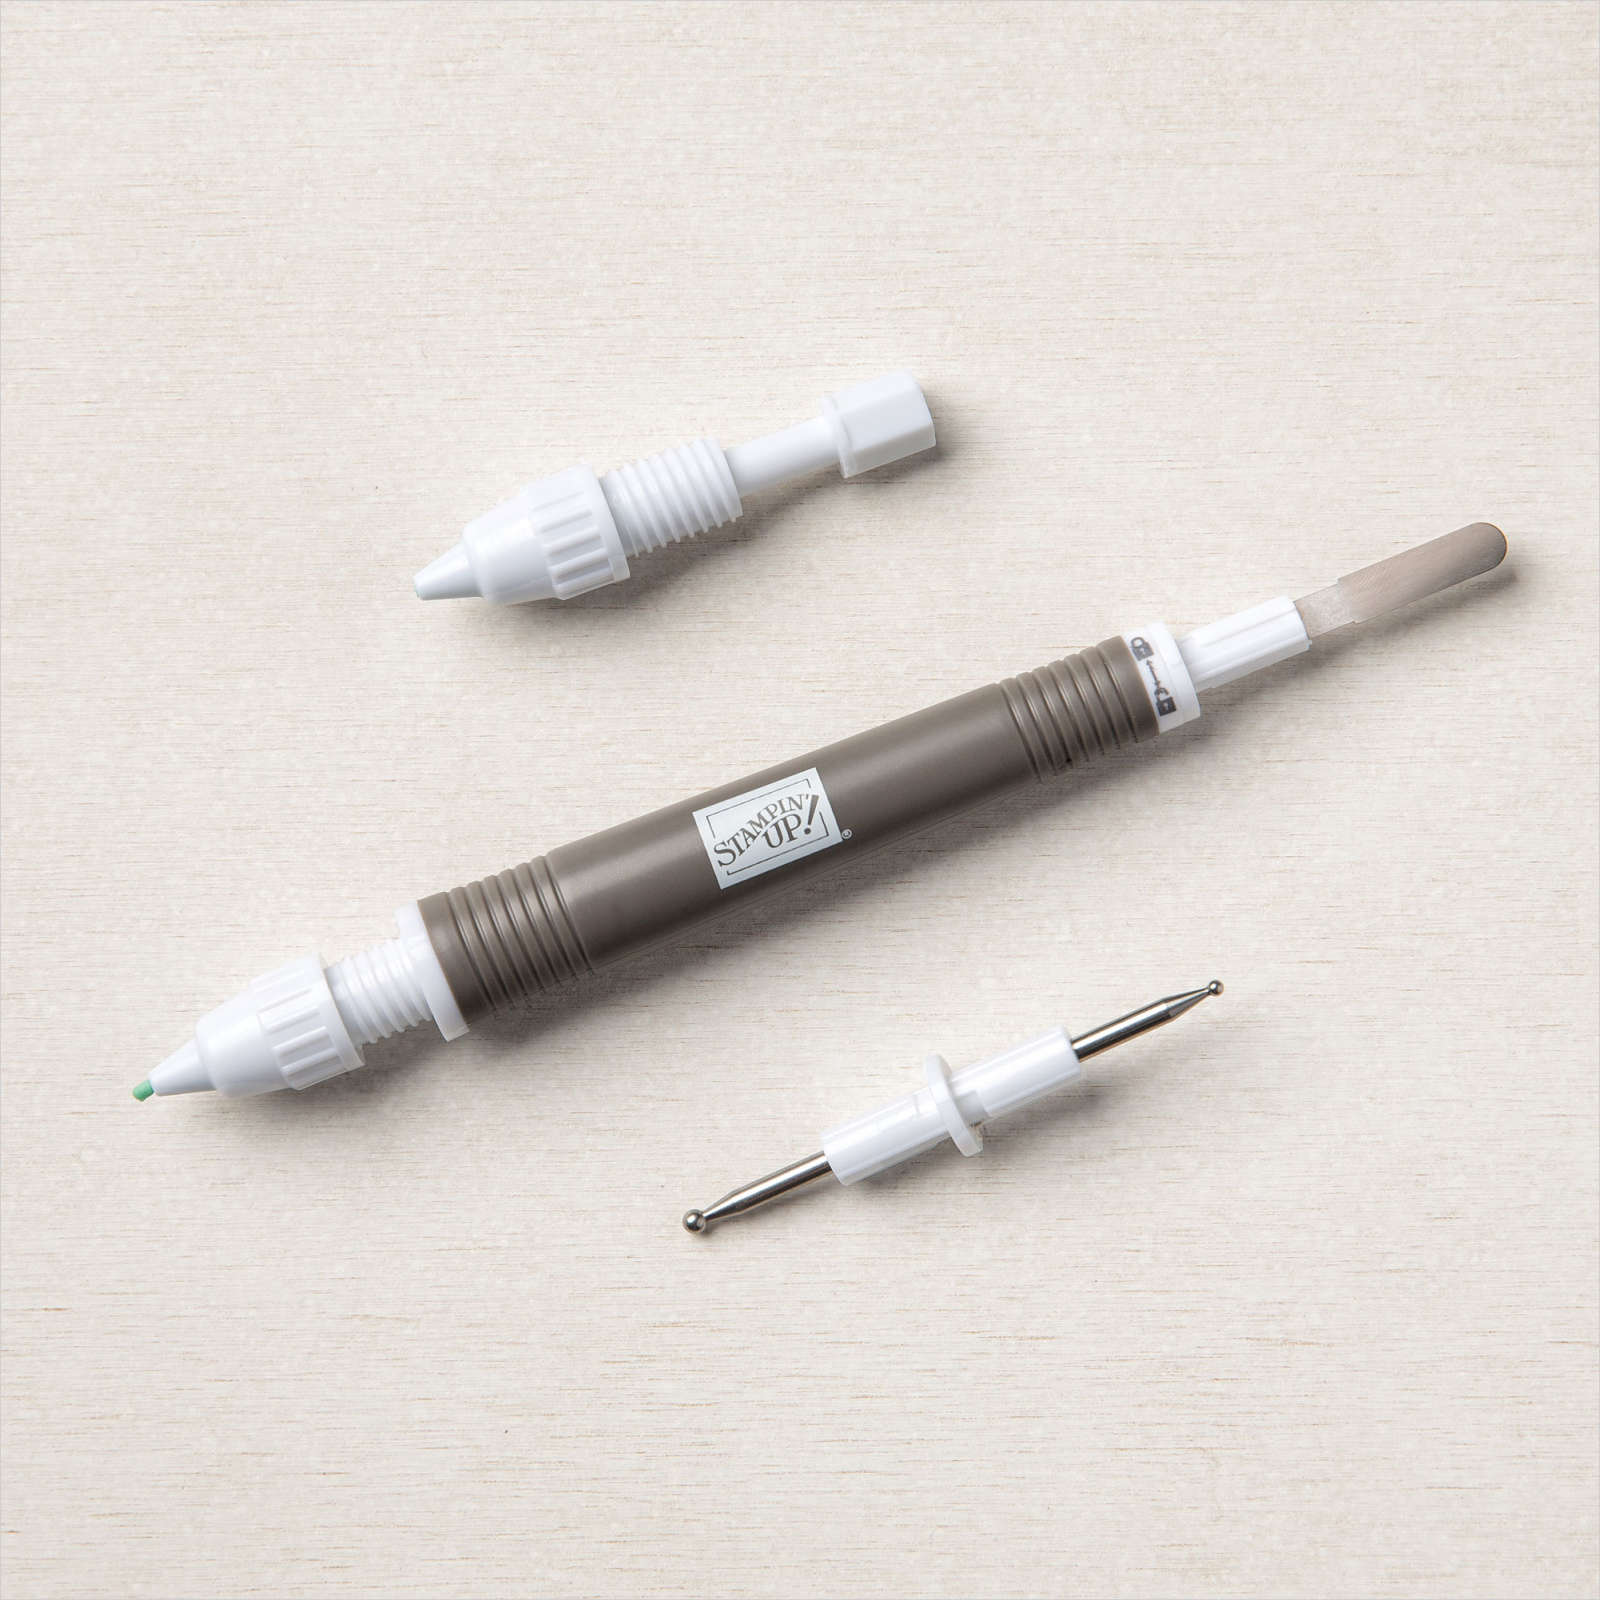
12) Time to add some sparkle to the finished flower panel. Use the piercing tip option from the Take Your Pick tool, remove 3 of the smallest Gold Glitter Enamel dots and apply as shown below. (this tool has 2 changeable double-ended tips)
13) Typically you want to add embellishments in odd numbers to your projects. Applying 3 in a triangle configuration gives a pleasant look.

14) Adhere the large floral panel to the Think whisper white card base ( make sure your fold is on the left hand side). Glue the small finished floral panel on the large floral base. Attach 1 Stampin’ Dimensional under the right hand side of the sentiment only. Apply Multipurpose Adhesive to the far left underside of it. Adhere the left side of the sentiment on top of the floral panel which has 3 layers of paper on it, the dimensional on the right compensates the height of the 3 layers for the right side.
15) Customize your gorgeous floral card by making a pretty matching envelope with the Poppy Parade ink and the flower image from the Art Gallery stamp set . Your stamped envelope will stand out amongst the other plain mail often seen in our mailboxes.
Product Used - Avid


Current Host Code
FWXMRPPT
REMEMBER
Only use the code for orders under $150.00
Articles
Is Paper Pumpkin Worth It?Challenge Yourself to Be a Better Stamper
Beginner Stamping
Intermediate Stamping
Advanced Stamping
5 Reasons Why I Love Designer Series Paper
5 Tips Every Stamper Should Know
Rewards
Collect Pam's Stamping Bucks on every qualifying purchase and redeem your bucks for great rewards.
Read MorePaper Pumpkin
Subscribe to Paper Pumpkin, a monthly card making kit delivered right to your door.
Find Out MoreInspiration Gallery

Visit the Inspiration Gallery to see examples of finished cards. You are bound to find something that inspires you!
Get Inspired!Value Stamp Sets
Explore stamps sets which are $18 or under. Great product for great prices!
Explore Stamp SetsLet's Stay Connected
Subscribe

Join my email list to find out my tips, project card measurements and supplies, color coordination, and mini tutorials.
Click here to BeginThe Mini Store
The Mini Store has great product combinations for an easy shopping experience. Come check it out!
Visit the Mini StoreThe DSP Shop
The Designer Series Paper (DSP) Shop combines the best DSPs with their matching card stock. Fun and easy!
Explore DSP Shop